Appointments: External scheduling
Set up an external scheduler for appointments
Castellum allows the use of an external scheduler. That way subjects can select the dates for appointments for study sessions themselves.
Note
Note that this is an optional feature which may not be activated in your setup. If the links referenced in this guide are missing from the user interface, the feature is not installed. If you would like to use it, please talk to the administrator of your castellum instance.
Find the scheduler link in castellum
On the startpage, click Studies.
In the studies list, select a study by clicking Details.
Go to the Sessions tab.
If there are no sessions yet, create some: Set up the recruitment process
Next to a session, click Edit.
On the bottom, under External schedule ID, click New schedule.
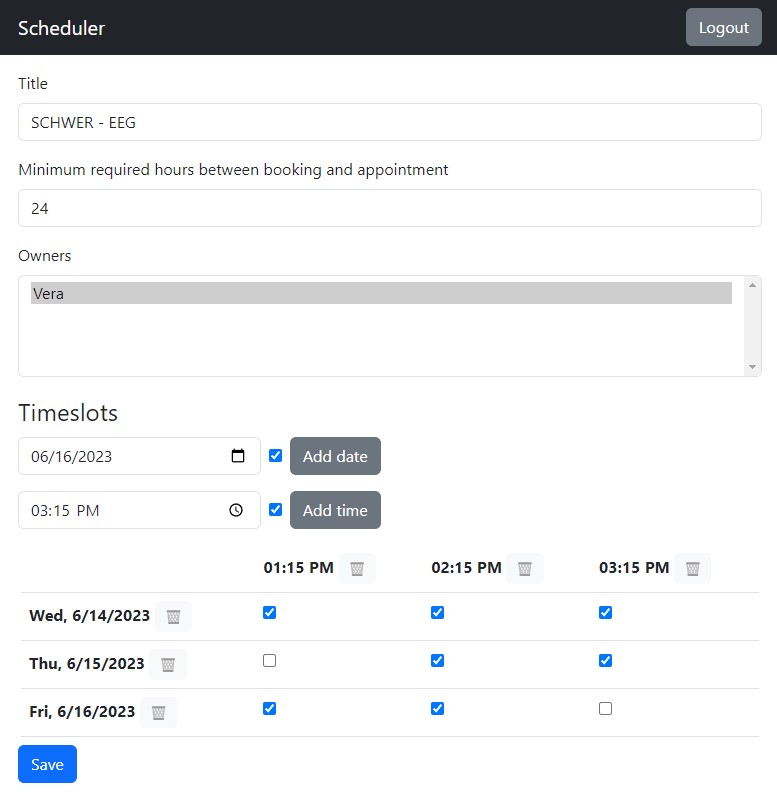
Create a new schedule in the scheduler
Log in to the scheduler using your credentials.
On the startpage, click Create new.
Add a meaningful title such as the name of the study, the session this scheduler refers to, or a combination of both. Keep in mind that the title will be visible to subjects.
Minimum required hours between booking and appointment: You can set how many hours before an appointment a subject should be able to book it. For example, if you need one day to prepare for an appointment, you can input ‘24’ in this field.
You can appoint yourself and other people as owners of the schedule. All owners will be able to make adjustments to the schedule.
Under Timeslots, add all dates on which appointments are available and each time confirm with Add date. Each date will add a new row to the table below.
On the next line, add all times on which appointments are available and each time confirm with Add time. Each date will add a new column to the table below.
Clicking on the checkboxes allows to deactivate individual slots for refinement.
Clicking on the trash bin symbol removes the entire row or column.
Confirm your selection by clicking Save.
After saving, the ID of this schedule will appear at the bottom, under Schedule ID. Click on Copy, to have it ready on your clipboard, as you will need it in the next step.
Enter the schedule id in castellum
Return to the editing page of your session in castellum. If you have closed the corresponding tab on your browser, then repeat the first step of this guide, without clicking on the New schedule link.
Under External schedule ID, paste the schedule ID.
Confirm with Save.
The scheduler can now be used in recruitment.
Make appointments with the external scheduler
Castellum allows the use of an external scheduler. That way subjects can select the dates for appointments for study sessions themselves.
Note
Note that this is an optional feature which may not be activated in your setup. If the links referenced in this guide are missing from the user interface, the feature is either not installed or not used for this session. If you would like to use it, ask the study coordinator for this study to enable it.
After the Study Coordinator has set up the external scheduler for a session of your study, you can make individual appointments for participants, or send them the individual scheduler link to book the appointment themselves.
Navigate to the participant’s individual scheduler link:
in the subject details (step for of this guide: Recruit subjects via phone), in recruitment, click Appointments.
Click Select timeslot for this subject to go to the scheduler. Clicking the “Copy” symbol will copy the scheduler link to your clipboard so you can send it to the subject via email.
In the scheduler, select an appointment and click Save. This step can also be done by the subject themself (if you’ve sent them the link), without logging in. The appointment will be visible in Castellum after a short time and the selected timeslot won’t be visible to the next subject.
If the change affects the next two working days, the relevant conductors will automatically be notified of the change.